Do you keep knocking your food off the couch? Why are you eating in the living room in the first place? Let’s assume food on the couch is going to happen, so let’s make a heavy tray so it doesn’t spill!
First make sure you have all of the supplies you need.
On day 1, you will need:
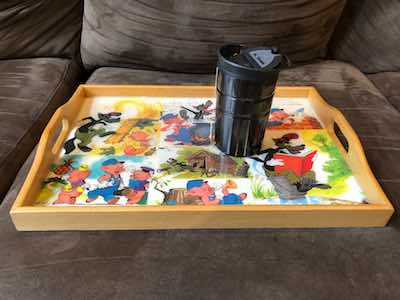
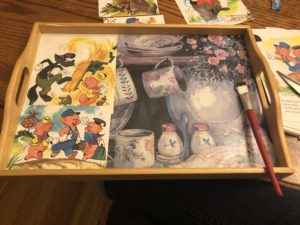
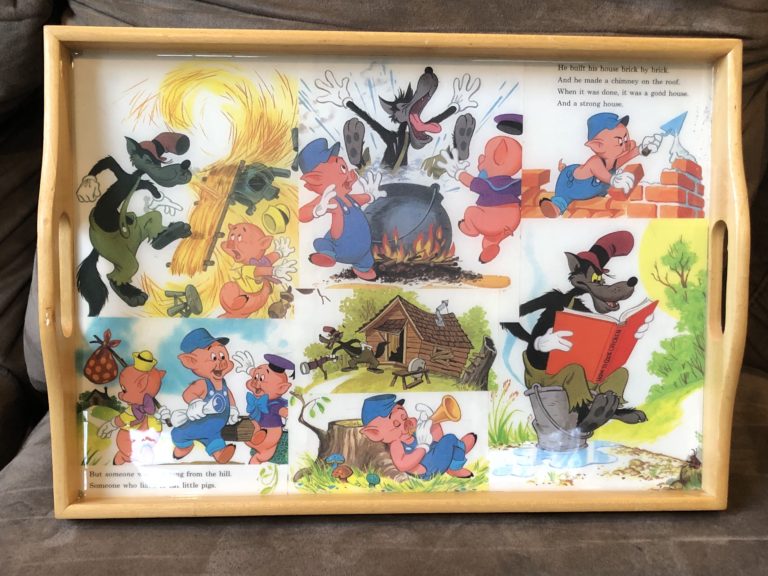
A tray. I found one at Savers for $2, and while I thought it was ugly my kiddo thought it was beautiful and I shouldn’t do anything to change it…
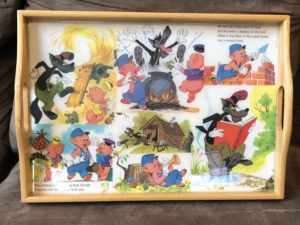
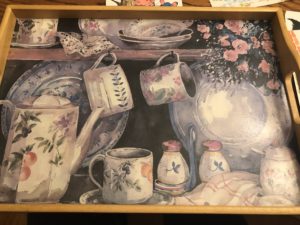
A book, or some sort of paper you want to decoupage onto the tray.
Your favorite decoupage. I like to use Matte Paper Mod Podge when I’m working with book pages, but others will work too.
Chopsticks (or some other disposable pokey thing.)
Plastic for the table (optional but HIGHLY recommended)
Vinyl (or Latex) gloves (For epoxy resin I would definitely do this)
Patience. No, for real. This stuff has to set for 24 hours!
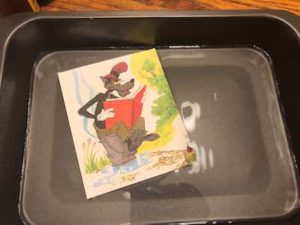
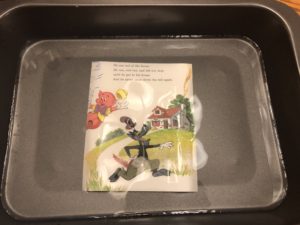
Day 1: When you’ve got the tray, start cutting up your paper and plot out where it’s going to go. When you’ve got it all set up, you will want to take it off and arrange it on the table so that you don’t forget where you wanted it to go! The next step will be to decoupage the paper down where you want it to go. (Decoupage is really just watered down glue, so if you wanted to could always try out a little school glue with water. I’m terrible at getting the mix right so I leave it to the professionals.) BUT WAIT! Before you start the gluing, wet the paper a bit to soften it up and keep it from buckling
This is where the water comes in. I advise testing it out on paper from the book that you don’t care about to make sure it can handle the wetting. Just dampen, and dab dry with a paper towel. (As seen on my stash box tutorial!)
*This is going to be your last step on day 1. *
After each piece has been dampened and dried off a bit, go ahead and paint some mod podge on the tray and put the pieces into place. Once everything is where you want it to be apply a thin layer over the top of the whole piece. When that dries go ahead and paint another layer on top. Make sure to get into all of the cracks at the edges to seal it up.
AND NOW WE WAIT…
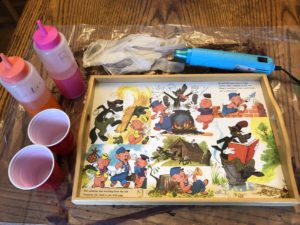
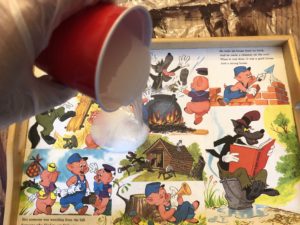
Welcome to Day 2! For this part you will be working with 2 part epoxy resin. (Also called casting resin) I have mine decanted into squirt bottles because I am hella lazy. It needs to be mixed in equal parts, so I squirt it out into cup #1. If you follow the directions on the box you will pour equal amounts into their own cups, pour those into one cup, and mix before pouring into another cup.
** Rememer to put down your plastic and put on your gloves! It’s a good choice for your table and your skin. **
In my own supreme act of laziness I squirt what seems like equal amounts into cup #1, mix like crazy for a minute, then scrape the sides and pour into cup #2. I haven’t had any problems with this method so I’m going to keep running with it. But I speak from experience when I say Don’t Skip the Second Cup! Even I, the laziest of all crafters, have learned the hard way that if you skip that step it will not cure properly and you end up with a sticky end result. And a Big Sadness.
Pouring the resin right in the middle feels a little strange at first, but I find it’s the best way to get it into all the corners and edges. Instead of using a foam brush to spread it around I just tip the tray and let it slide around. This tends to lead to less resin getting stuck on the sides, and ends up spreading out more evenly.
Please enjoy this clip of resin dripping down the tray. Also the delightful sounds of my 5 year old and his friend ignoring me when I’ve asked them to be quiet. Which I’m sure surprises no one.
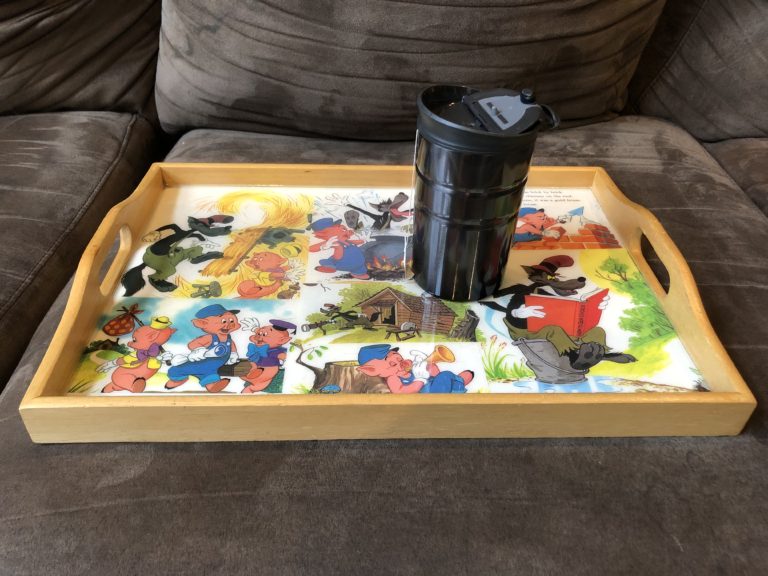
Once the resin is covering the whole tray you’ll notice air bubbles. The best way to get them out is to use a heat gun or a hair dryer. It’s actually hypnotic to watch, they just disappear! I got the heat gun at Michael’s with a half off coupon for under $15. (It’s with the gift wrapping stuff, to be used with shrink plastic.)
Note: I wouldn’t usually say go full screen, but in this case the small size doesn’t show off the bubble popping action.
Once the tray is covered in resin and all of the air bubbles have been popped you are ready for the hardest part of this whole shebang. WAIT 24 HOURS! Don’t touch anything, just leave it be. I promise all that touching it early will do is make your finger sticky and make your project have a finger print in it. And that’s it! Once it’s cured, it’s good to go!
Thank you so much for taking the time to read through this page! If you buy anything from the links that are included in this entry a small portion will go to helping keep this website up and running. Which helps keep me sane, and helps you make awesome stuff. <3